30.11.11

Back of pouch

Szybki post by pokazać tył kosmetyczki, którą ostatnio pokazywałam. Moja Partnerka w wymianie (Michelle, I like orange too) otrzymała przesyłkę, więc nie ma przeciwwskazań by pokazać całość.
/ Just a qick post to show back of pouch that I've showed lately. My Partner (Michelle aka I like orange too) got it, so know I can show it without reveling the secret:


Szycie malutkich metek było najfajniejszą częścią całego szycia!
/ Piecing this thiny tags was so fun!

29.11.11

Inspired / Zainspirowane

Dziś napiszę parę słów (to u mnie rzadkość:) o inspiracji pracami innych osób, która mnie ostatnio dopadła. Obok wielu prac nie potrafię przejść obojętnie - wywołują u mnie chęć spróbowania czegoś nowego - przede wszystkim nowych (dla mnie) wzorów i zestawień kolorystycznych (wszystkie te rzeczy zaczęłam szyć nie mając pojęcia co zamierzam uszyć - nadal nie mam).

/ I would like to write a few (just a few:) words about inspiration coming from other people works that came to me lately. I admire lots of works on Flickr and some of them are so inspiring that I had to try piece a few things (not sure yet what I'll done with it).


Gdy ujrzałam TEN quilt natychmiast się zakochałam! Kolory, układ, tkaniny - wszystko wspaniałe. Rozważałam nabycie tego quiltu, ale możecie sobie wyobrazić co powiedziałby na to mój mąż. A więc zostało mi podziwianie, aż w końcu zdecydowałam uszyć parę małych różowo-beżowo-szarych bloków. Nie uszyłam gwiazd, nie trzymałam się oryginalnych kolorów i tkanin - po prostu musiałam coś w podobnym stylu szybko zszyć.

/ When I saw THIS quilt I was in love! Colors, design, fabrics - everything wonderful. I was thinking of buying this quilt, but you can just imagine what my husband would say. So I was admiring it every day and finally I decided to sew a few small blocks in pink, beige and gray. I didn't pieced stars and didn't used exact colors and fabrics from this quilt, but anyway I tried piecing something in pink-beige colorway.

[photo coming soon / zdjęcie wkrótce]


Następna inspiracja, która mnie dopadła, została wywołana przez TEN quilt. Oczywiście jego też chciałam nabyć. Zamiast kupna zaczęłam szyć, ale po paru kwadratach moje coś zaczęło totalnie odbiegać od oryginału.

/ The next one is THIS quilt. So as the previous one I wanted to have it at home. Instead of buying it, I pieced a little part, but after piecing the center my block started coming far away from original.


Następne "coś" uszyłam pod wpływem paru prac, stanowi kompilację wielu obrazów, które tłoczyły się w mojej świadomości. Chciałam przede wszystkim spróbować uszyć coś z tłem w naturalnych kolorach, ale nie mam zbyt wielu tkanin tego typu, więc wyszło jak wyszło, ale że bardzo mi się podoba, to chyba nie powinnam narzekać! (wielkość - jak podkładka obiadowa - nadal nie mam pojęcia do czego tego użyję:).

/ The next 'something' is pieced under influence of couple of works, it's a compilation of images that I've seen. I wanted to piece something with natural background, but I don't have a lot of such fabrics, so I came with something different, but I love it! (it's small - like placemat - and I have no idea what to do with it:).


Ostatni blok jest na wpół skończony - muszę dodać jeszcze jeden kwiatek (i zastąpić "T" czymś większym). Kwiat pochodzi z książki Suzuko Koseki, jest aplikowany ręcznie i powinnam częściej używać tej techniki (uspokaja doskonale). Kolory początkowo miały być zupełnie inne, ale skończyło się oczywiście na kolorystyce, która ostatnio siedzi w mej głowie.

/ The last block is half finished - I'll have to add one flower more (and I'll replace that "T" in the middle to something bigger). Flowers come from a Suzuko Koseki book, it's hand appliqued and probably I should do it more in the future. The colors were planned totally different, but I came up with the colorway which I'm keen lately.

26.11.11

Zwycięzca / Winner

Bez wstępu, szybciutko:
/ Just a quick note:


Accuquilt GO! Baby wraz z trzema wykrojnikami wygrała:

/ GO! Baby with three dies wins:


Gratulacje!!!

/ Congratulations!!!


Ale, ale... to jeszcze nie koniec!
Pan Random.org wybrał jeszcze jednego Zwycięzcę, który otrzyma Layer Cake "Nature's gift":

/ But this is not the end!
Mr. Random.org has chosen another one lucky Winner, who will get Layer Cake of Nature's gift:


A jest nim:


(tak spieszyłam się z losowaniem, że nie skopiowałam wyników z Random.org, więc musicie mi uwierzyć na słowo)
/ (I was in such hurry that I didn't copy results from Random.org this time)


Zwycięzców proszę o kontakt:)


A tych, którzy tym razem nie mieli szczęścia zachęcam do wizyty na stronie Accuquilt, na której znajdziecie niesamowite promocje:

/ Those of you who didn't have luck in giveaway I invite to Accuquilt website, where you'll find fantastic Black Friday deals!

20.11.11

Swaps and bees

Jeśli szukasz cuksów GO! Baby, kliknij TUTAJ:)
/ If you're looking GO! Baby Giveaway, click HERE:)


Ostatnio skończyłam parę drobnych przedmiotów na wymianki i pszczelich bloków - dziś więc szybki post by je wszystkie pokazać.

Kosmetyczka na wymiankę Pretty Little Pouch Swap:

/ Recently I finished some swaps and bee blocks - just a quick post to show them.

A pouch for Pretty Little Pouch Swap:


Nie mogę pokazać tyłu, bo zbyt oczywiste będzie kto jest moim tajnym Partnerem:)
Ale mogę pokazać małą podkładkę dołączoną do przesyłki:

/ I can't show yet the back, because it will be easy to guess who's my secret Partner:)
But I can show the little coaster, which I send with the pouch:


Na wymiankę Trim the Tree Handmade Ornament Swap uszyłam takie ozdoby choinkowe:

/ For Trim the Tree Handmade Ornament Swap I sewed such ornaments:


I na koniec jeden blok (Tag Square Bee):

/ And finally one bee block (Tag Square Bee):


Zamieściłam ozdoby choinkowe w:
/ I submit my ornies to:
Fresh Poppy Design

11.11.11

GO! Baby giveaway!!! Cuksy!!!

Pamiętacie mój Sweet Shop pillow pattern uszyty przy pomocy wykrojników GO! ?

Nadszedł czas na cuksy AccuQuilt GO! Baby!
Do wygrania GO! Baby cutter wraz z trzema wykrojnikami do wyboru!

/ Remember my Sweet Shop pillow pattern made with GO! dies?

Now it's time to start an AccuQuilt GO! Baby giveaway!
You can win a GO! Baby cutter with 3 dies of your choice!


Jak wygrać?

1. Napisz komentarz z nazwami 3 wykrojników, które chciałabyś wygrać (kliknij TUTAJ by obejrzeć wykrojniki).
2. Moi drodzy Obserwatorzy mają drugą szansę! (nowi również:) - wystarczy napisać oddzielny komentarz potwierdzający, że jest się obserwatorem.
3. Jeśli dodasz banner na swój blog (na pasku bocznym albo w nowym poście - wg Twojego uznania) - masz kolejną szansę na wygraną (napisz oddzielny komentarz potwierdzający, że banner został dodany).


/ How to win?

1. Write in a comment the names of 3 dies which you would like to win (GO! HERE to see dies).
2. My dear followers have one chance more! (new ones too:) - just simply write separate comment telling me that your are follower.
3. If you add a button on your blog (on your sidebar or in new post - your choice), you'll have 3rd chance (write separate comment telling me that you add it)


Cuksy trwają przez 2 tygodnie - do 25 listopada 2011 r. (do 24:00).
26 listopada 2001 r. Pan Random.org wylosuje szczęśliwego Zwyciezcę.
Zwycięzca będzie miał 5 dni od ogłoszenia wyników na zgłoszenie się po nagrodę. Po tym czasie zostanie wylosowany nowy Zwycięzca.

/ Giveway is open for two weeks - till November 25, 2011 (24:00 CEST).
On November 26, 2011 Mr. Random.org will choose a lucky Winner.

The Winner will have 5 days for claim the prize. After that new Winner will be chosen.


Dodatkowo macie możliwość otrzymania 22 DARMOWYCH wzorów!
Wystarczy kliknąć TUTAJ i dodać adres email! (newsletter Accuquilt zawiera bardzo często różne niespodzianki, więc naprawdę warto się zapisać!).

/ Do you want to receive 22 FREE patterns?

Just click
HERE and when you submit your email address, you'll get it! (you'll also get Accuquilt newsletter with many interesting features!)


Powodzenia!
/ Good luck!


Oto banner:
/ Here's the banner:


Pracuję nad kodem:) niedługo będzie dostępny!
/ Workind on the code - soon will be available!

6.11.11

My very own / Mój własny

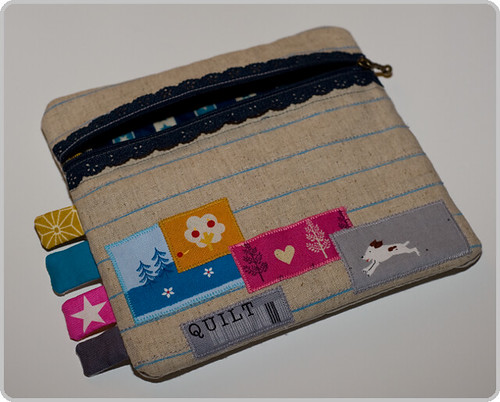
W dużym pokoju pokoju na kanapie leży cały czas kołderka Marysi (TA), ale gdy tylko chcę się nią przykryć, słyszę: "Mamusiu, nie bierz moich kotków!". A więc rozumiecie, że nie miałam wyjścia i musiałam uszyć sobie mój własny lap quilt (lap quilt - kołderka na jedno "okrążenie").

Wielkość tej kołderki jest zbliżona do kołderki Marysi, mój mąż twierdzi, że jest zbyt mały, ale tej zimy będzie dla mnie w sam raz (może następnej zimy sprawię sobie większy - mam nadzieję, że do tego czasu moje umiejętności pikowania będą lepsze).

/ On a sofa in our livin groom Mary's quilt lays all the time (this ONE), but when I want to get it, my daughter tells: "Mommy, don't take my kitties!". So you understand why I didnt' have a choice and had to sew my very own lap quilt.
Its size is more similar to baby quilt, my husband says it's to small, but for this winter it will be perfect for me (maybe for the next winter I'll sew bigger one - I hope that my quilting skills to this time will be better).


Szyłam ten quilt powoli, bez pośpiechu. Zawsze po skończeniu szycia innych rzecz dodawałam kawałek do niego i w ten weekend był gotowy do pikowania. Jestem bardzo dumna z siebie, że go skończyłam, gdyż parę lap quiltów rozpoczętych leży w szafie i raczej nie doproszą się o skończenie.
Około 70% quiltu jest wypikowana naprawdę fajnie, górny rząd niestety nie miał tyle szczęścia, Ale - hej! To jest quilt dla mnie - nie musi być perfekcyjny dopóki go kocham. A kocham go bardzo!

Bloki są w 80% uszyte ze skrawków z moich ulubionych tkanin. Na początku był plan na dwustronny quilt, ale po uszyciu dwóch bloków na tył, zrezygnowałam z tego pomysłu i użyłam tych bloków do uszycia przodu zamiast bloków z brzegów fabrucznych tkanin, które chciałam uszyć. Przygotowane brzegi fabryczne posłużyły za lamówkę - perfekcyjnie pasującą do tego quiltu.


/ I was sewing it slowly, without a hurry. When I was sewing different things, I've always add something to it and on this weekend it was ready to quilt. I'm really proud of myself that I've finished it, because I've got a few started lap quilts and probably they won't ever be finished.
About 70% of this quilt is quilted really nice, but the top row of the quilt was not so fortunate. But - hey! That's a quilt for me - it doesn't have to be perfect as long as I love it. And I really do!

Blocks are in 80% scrappy - lots of my fave fabrics. At first I thought it will be two-sided, but after making two blocks for the other side, I gave up from this idea and these two blocks are on the front instead of selvages blocks, which I wanted to sew. But prepared selvages were used for a binding - perfect for this quilt!


Bardzo się cieszę, że mam taki piękny quilt (tak, nie boję się pochwalić - chyba po raz pierwszy w mojej karierze quilterki:).

/ I'm so happy that I got this gorgeous quilt (yes, I'm not afraid of showing off - probably for the first time in my quilting career:)

I submit my quilt to:
Fresh Poppy Design


PS. My quilt was:
Modern Day Quilts

1.11.11

Sweet Shop pillow - pattern

Polska wersja tutka pojawi się w nadchodzący weekend:)

My story about Drunkard's Path:)
Over a year ago I won pieces of fabric cut using GO! Drunkard's Path 7'' (details HERE). When I got it, I just couldn't believe how piecing Drunkard's Path is easy! I was sure that rotary cutting this block would not be so easy, would be timeconsuming and not so precisely as die cuts. So I started dreaming about GO! Cutter. But I wasn't only dreaming: I've started saving money. And lately I finally buy GO! Cutter (yey!).
Recently I've got opportunity to test Drunkard's Path 5". Piecing this size of Drunkard's Path is more difficult than piecing Drunkard's Path 7", but after a few blocks everything is easy and fun:)
When I was at training (totally not related to patchwork&quilting) I got some squared pieces of paper and I was playing with Drunkard's Path shapes. I figure out a few interesting combination at the break - one of them is the roof of Sweet Shop. But you can be sure that patterns or tutorials using this block will be more!

Pillow made using my pattern will be large (20 inches):


Attention! All measures and tips are given to make the pillow you see in my photo. Alternations are very welcomed:)
All sizes (except pillow size and roof size) are approximately (because I sew in centimeters and recalculating measurements from centimeters to inches gives strange results - such as 7,6 inches - so I decided to give measurements approximately).


Fabric requirements

Roof: 9 stripes measuring 5 x 10 inches (if you are new to GO! cutting system make stripes 5,5 x 10,5 inches)
Background next to the roof: 2 stripes measuring 5 x 10 inches (if you are new to GO! cutting system make stripes 5,5 x 10,5 inches) + small rectangular measuring approx. 3 x 4 inches
(a few parts of Drunkard's Path block will left - as on the roof I used 9 different fabrics)

Wall: less than Fat Eight (approx. 9 x 11 inches)

Window: 4 squares measuring approx. 3 x 3 inches, small stripes in two colors

Doors: rectangle measuring inches 5 x 7 inches, stripes in two colors, cirle (cut using GO! Circle 2" die)

Sign-board: fabric scraps with words


Piecing

Piecing the roof:

Piecing the roof is the most important part of this pattern.
Cut using your Go! Cutter Drunkard's Path 5" 18 blocks of colorful fabric (this means that you'll have to cut 9 times as Drunkard's Path Die cut at once two Drunkard's Path complete blocks) and 4 blocks of background fabric (you'll cut 2 times).

Excellent video tutorial on piecing Drunkard's Path blocks you'll find on blog of super talented Kerry (HERE).

Before you piece parts of Drunkard's Path blocks you can lay down Drunkard's Path pieces to make sure the order of piecing together is right - this scheme can be used as a guide:

When each block is pieced, put all blocks in order shown above and cut a stripe from each of using the following schemes:

Cutting stripes from Drunkard's Path blocks and piecing top row of the roof:

Cutting stripes from Drunkard's Path blocks and piecing bottom row of the roof:

Piecing the roof together (add two rectangles as shown):


Piecing the window:


Piecing doors:


Piecing the sign-board:
use your scraps to piece the sign-board or embroider the name of you shop. Finished sing-board measures approx. 2 inches x 5 inches.

Piecing all parts together:


Quilting tips

Wall is quilted straight, so as doors. Window is quilted on the seems. The roof is quilted firstly on the seems and then I made echo quilting.


Making the pillow

I was in such a hurry that I didn't take photos of making the pillow, but I promise that tutorial on this is put on my 'to do list of tutorials':)

Pattern in PDF
Pattern in PDF is available HERE (all details are clearly visible!).


Enjoy!

Dziękuję! Thank you!

Chciałabym Wam bardzo podziękować za głosy na mój puf! Z głębi serca! Wasze wsparcie jest bezcenne i mając w myśli, że jesteście gdzieś tam powoduje, że uśmiecham się do komputera:)
A tak przy okazji: mój puf zajął drugie miejsce:)

/ I would like to thank you sooo much for voting for my poof! From the bottom of my heart! Your support is priceless and having in mind that you're somewhere out-there makes me smile to the computer:)
By the way: my poof took second place:)


Staram się by mój blog był bardziej pomocny dla patchworkujących (szczególnie początkujących takich jak ja) i wkrótce znajdziecie na nim wiele tutków, schematów i interesujących cuksów.
Mój pierwszy (darmowy) schemat patchworkowy pojawi się już wkrótce (najprawdopodobniej dzisiaj), ale to dopiero początek, gdyż pracuję nad wieloma rzeczami:)

/ I'm trying to make my blog more helpful for quilters (especially for beginners like me) and soon my blog will be full of tutorials, patterns and interesting giveaways.
My first (free!) pattern is coming very soon (probably today in the late evening), but I'm working on many more:)